Use code to create something you can hold
When The Holler first began, programming and creating interesting products using code was on the short list of skills we hoped to encourage. Fast forward and the Appalachian Renaissance Initiative (ARI) and the Appalachian Technology Institute (ATI) have created an opportunity for high school students to learn programming as part of their daily class schedule. The Eastern Kentucky region has evolved from a select handful of courses being offered to hundreds of students actively learning Javascript, Python, and the Web design languages HTML and CSS.
Learning a programming language is like learning French, Spanish, or German.etc., It is just written and not spoken. One of the first frustrations you see in a new programming student is the time it can take to really master or understand the new language, but you wouldn’t expect to be fluent in Spanish one or two months into the learning process so you should not expect to be fluent in Javascript at first either. Once you do start to master the language, or are able to edit and write some original code, you can often be left with one glaring thought: what do I do with this now?
The Holler has started a new program, live streamed on Twitch.tv, to address this issue in a proactive and interesting way. Coinciding with the global Hour of Code Week by Code.org, and using tutorials and components from electronics company Adafruit, The Holler spent the week building a custom yellow Gameboy called the PiGrrl. The PiGrrl gets its name from the $20 Raspberry Pi microcomputer that handles the processing of classic Nintendo, Super Nintendo, and Gameboy games. The project was not easy. It took the normal Holler media crew completely out of their comfort zones as they soldered wires onto makeshift circuit boards and followed wiring schematics to make sure the micro USB port could both power the PiGrrl and charge the internal Lithium Ion battery simultaneously.
Beyond the skills needed to engineer the case, 3D printed from Adafruit templates in The Holler studio, we also needed to program the Raspberry Pi to run the Linux-based game emulator system and to load the ROMS (game files) onto the operating system. If you have never used a Raspberry Pi, it is important to point out it does not come equipped with a preinstalled operating system. You must format and install a port of Linux onto a micro-SD card and boot the system using terminal commands. Transferring ROMS through the network and adjusting some Python code to accommodate for the extra two buttons we decided to include on the gameboy was an interesting coding challenge as well.
Operating out of our comfort zone, we also thought it was important to live stream this process on Twitch rather than creating a polished YouTube video of the production. We wanted students from the region participating in Hour of Code Week to be able to ask questions as we worked and to see the problem-solving methods we employed when we ran into issues or challenges, which we often did.
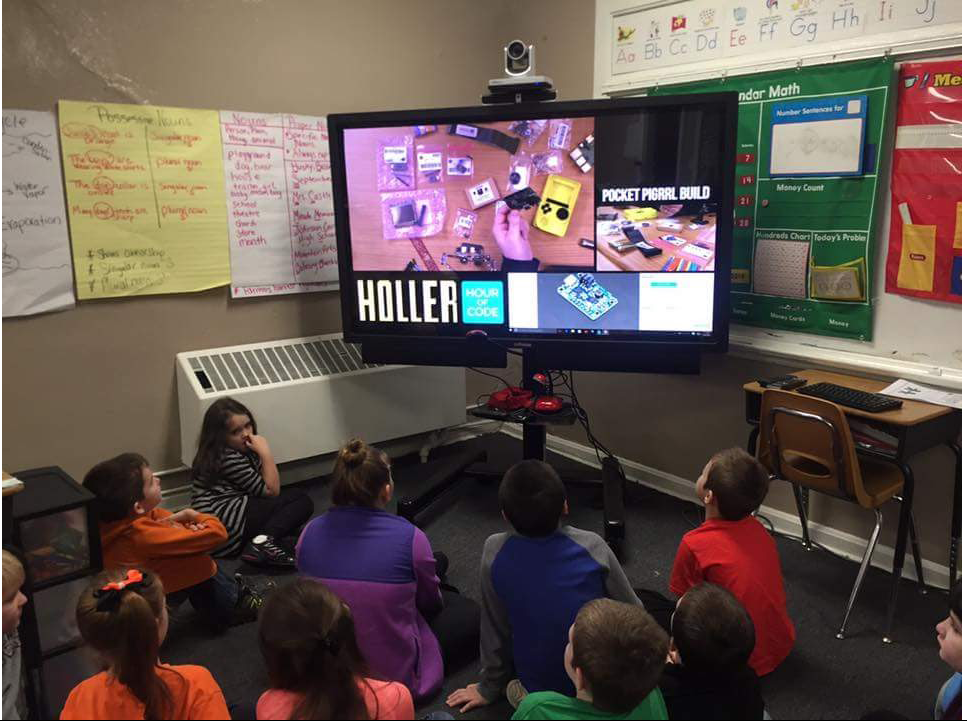
2nd graders from Mrs. Hyden’s class tune in from Johnson County
It is important to monitor both successes and failures when learning to work within programming and engineering, and the Twitch platform allowed us to connect with students in a very organic and natural way. We are looking forward to creating more projects with The Holler community and creating connections between the theoretical world of learning code and the tactile and tangible products that can be made after picking up a new language.
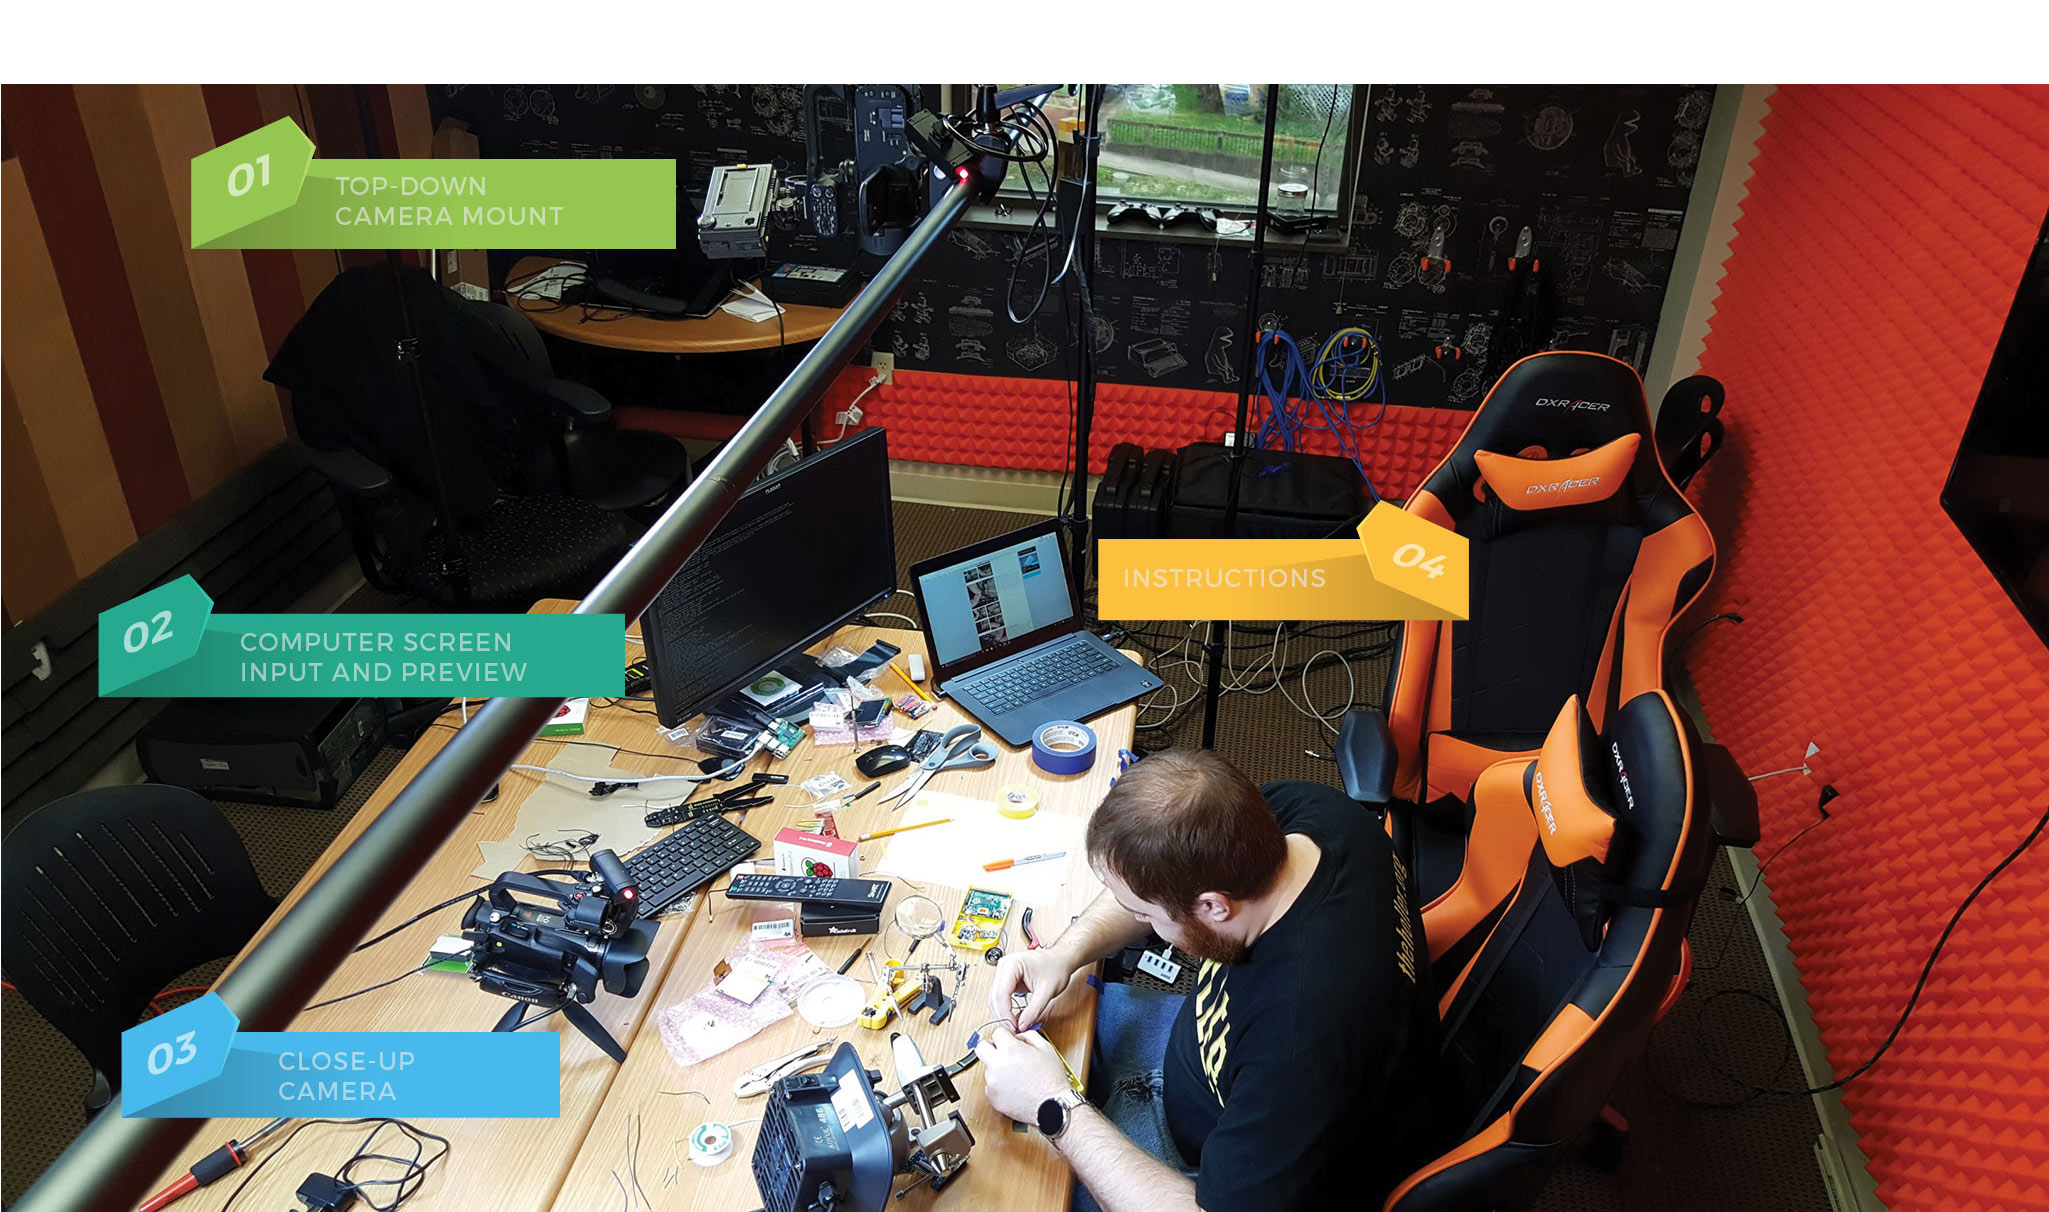
Where do we put the cameras?
When planning our shoot we wanted to be absolutely sure the audience could focus on the fine details and close up work required to complete the Gameboy build. To make it feel like the audience was in the studio with us, we incorporated a top-down camera to replicate the first-person perspective of actually working on this project. Top-down camera work has become popular in YouTube unboxing and build videos. Twitch users also utilize top-down cameras to bring people into the action of a creative project. Our top-down rig consists of a backdrop holder (two light stands with a cross bar) and a camera clamp. You can also create a simple top-down shot using a basic USB web camera. If you attempt a top-down shot be sure to secure your camera in case something in the rig fails. The last thing you need is a broken camera. Take your time, make sure everything is supported, and work on your shot.
Computer screen or program inputs are typically essential for a successful Twitch stream, but this was one of the rare cases where it wasn’t acutally neccessary. We included the Rasberry Pi screen to make sure users experiencing the Pi for the first time would be familiar with how the boot screen looks and the basic command line interface we would need to program the controls and transfer the classic ROMS over our network. While we only used this screen for a short time, it still added an interesting texture and feature to our stream.
Close-up cameraThis camera is the primary focus for our viewers. Much of the Gameboy build included soldering wires, using heat-shrink plastic, and generally making a mess of things. The close-up camera allows viewers to get right in on the action and view what’s happening as if they were actually sitting at the table.
In this case, the close-up camera can be slightly difficult to pull off. We had to continually adjust the shot to make sure the action was always in frame. To do this we used a tabletop mini tripod that we could easily maneuver and adjust. If we use a standard tripod for this we would have had to get up and move around the table every few minutes to adjust the shot. If you don’t have access or budget to buy a small tabletop tripod you can always use a standard tripod and assign someone to be on camera duty, ready to adjust at a moment’s notice.
Another potential problem is the proximity between the camera and the subject. Have you ever tried to get a close-up and no matter what you do the camera just won’t focus? If this is the case, your camera is too close to what you’re trying to film. Every camera lens has a minimal distance it must be away from a subject before it can get proper focus. Take some time and practice with your gear so you get used to the range you have to work with.
Our Rasberry Pi Gameboy build came from a company called Adafruit. They have a great education section on their site and we wanted viewers to see the instructions we were working from as we progressed through the build. Close-up camera